Read this article providing the best tips and tricks to remove unwanted files, keep files organized, and improve your system’s overall performance within minutes.
We know that it can be very frustrating when you are unable to find the file in this dump. Keeping your PC files messy or unorganized will tend to accumulate clutter. Your computer makes a lot of junk files as you keep using it, which is why they need to be cleaned regularly. These unwanted junk files also make your computer process slowly, eventually decreasing productivity.
If you are facing the same problem with your computer, then we have some of the best ways with which you can easily clear out your clutter. Removing trash files improves the system’s performance, saves a lot of storage space, and keeps your folder and files organized. So if you are fed up with the low storage space error that keeps coming on your screen, then imply the tips mentioned in this guide.
Tips To Remove Unwanted Temporary Files From Windows And Mac
You should always try using the native applications or tools that came with your PC. Because these tools are designed according to your system’s requirements, which makes them the optimal tool. Below are the different tools and methods including the best free junk cleaner for pc, which you can use to remove the unwanted files from your Windows or Mac PC.
Shortcut Keys To Delete File Permanently
Windows “File Explorer” tool is among the best tools present in the Windows 10 operating system. With the help of this utility, you can find and remove any kind of file from your PC. Below are some steps to use the shortcut keys to delete files, photos, videos, etc. permanently.
Step1: Right-click on the Start menu and select the File Explorer option from the list
Step2: On the File Explorer window, click on the Music, Videos, Pictures, Downloads, Documents, or other folders to find and delete the files.
Step3: Select all the files that you want to remove and then press the Shift + Delete keys simultaneously on your keyboard.
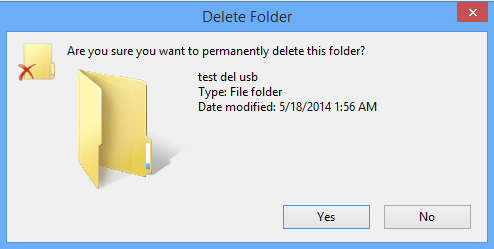
Step4: A pop-up window will appear asking for permission to delete the files permanently. Click on the Yes or Delete button to confirm your actions.
Clean Unwanted Files Using Windows Storage Sense
There is another Windows integrated utility called Storage Sense. This tool works just like Disk Cleanup but it has some more features to offer. You can set a time cycle in which this tool will automatically delete all the temporary files. It will also clean the junk or deleted files in the recycle bin. Here’s how to use it:
- Right-click on the Start button and select the Settings option from the list
- Click on the System option and then select Storage from the left-hand side list
- Under Storage, switch the toggle ON to turn on the Storage Sense
- Now, to make it work automatically, click on the “Configure Storage Sense or run it now” button
- Under Temporary files, click on the dropdown menu and select the number of days in which you want it to clean automatically
- Also, check the box in front of “Delete temporary files that my apps aren’t using”
Restart your computer after the completion of the process and check for storage space. Storage Sense will make room for new data by removing all the unwanted junk files.
Cleaning Unwanted Files Using Windows Disk Cleanup
One of the most common ways to clear unnecessary folders and files in Windows is by using Disk Cleanup. Instead of selecting files one by one and then deleting them, you should use this tool to make the process automated. Additionally, using this method will reduce the possibility of deleting important files. To use this tool follow the instructions mentioned below:
- Launch File Explorer and select This PC from the left-hand side panel
- Now, right-click on the drive from which you want to delete the unwanted files and select Properties from the list
- On the Properties window, select the General tab
- In the General tab, click on the Disk Cleanup button
- Under Description, click on the “Clean up system files” button
- Now, check the boxes next to all the folders, and then hit the OK button
- Restart your computer when the process is finished
Using this tool will help you clean all the temporary files from your computer. This will also free up some RAM space which will help your computer to run faster.
Remove Unnecessary Files From Your Mac Or Windows PC Using Duplicate File Remover
Having a duplicate file finder will help you keep your PC away from duplicate and unwanted files. It will also help you enhance your computer’s overall performance. There are a ton of applications like these in the market. But some of them are paid and others don’t have many features. So here we have shortlisted some of the best apps that will help you remove temporary files and improve your computer’s efficiency speed.
To best free junk cleaner for pc, click on the links given below:
- Quick Photo Finder
- Auslogics Duplicate File Finder
- Cisdem Duplicate Finder
Also read: How to Recover Deleted Files from SanDisk Pen Drive – A Quick Guide to Know
Remove Unwanted Files From PC Issue Resolved
We hope the different methods discussed above have helped you get rid of unwanted files from your computer. If you keep your computer clean, it will make both you and your computer more efficient. If you have any quires or suggestions related to this post share them in the comment section below.